 X
X

Hello Xiaomi Fans,
In our previous thread, we explored various creative effects to enhance our images. Now, let's dive into a more advanced technique: Curves.
Curves is a powerful tool that allows for precise control over the tonal range of an image. By manipulating the curve, you can adjust the brightness and contrast of specific areas, creating dramatic effects or subtle refinements.
Let's uncover the secrets of Curves and how to harness its power to elevate your photo editing skills.
How curves work
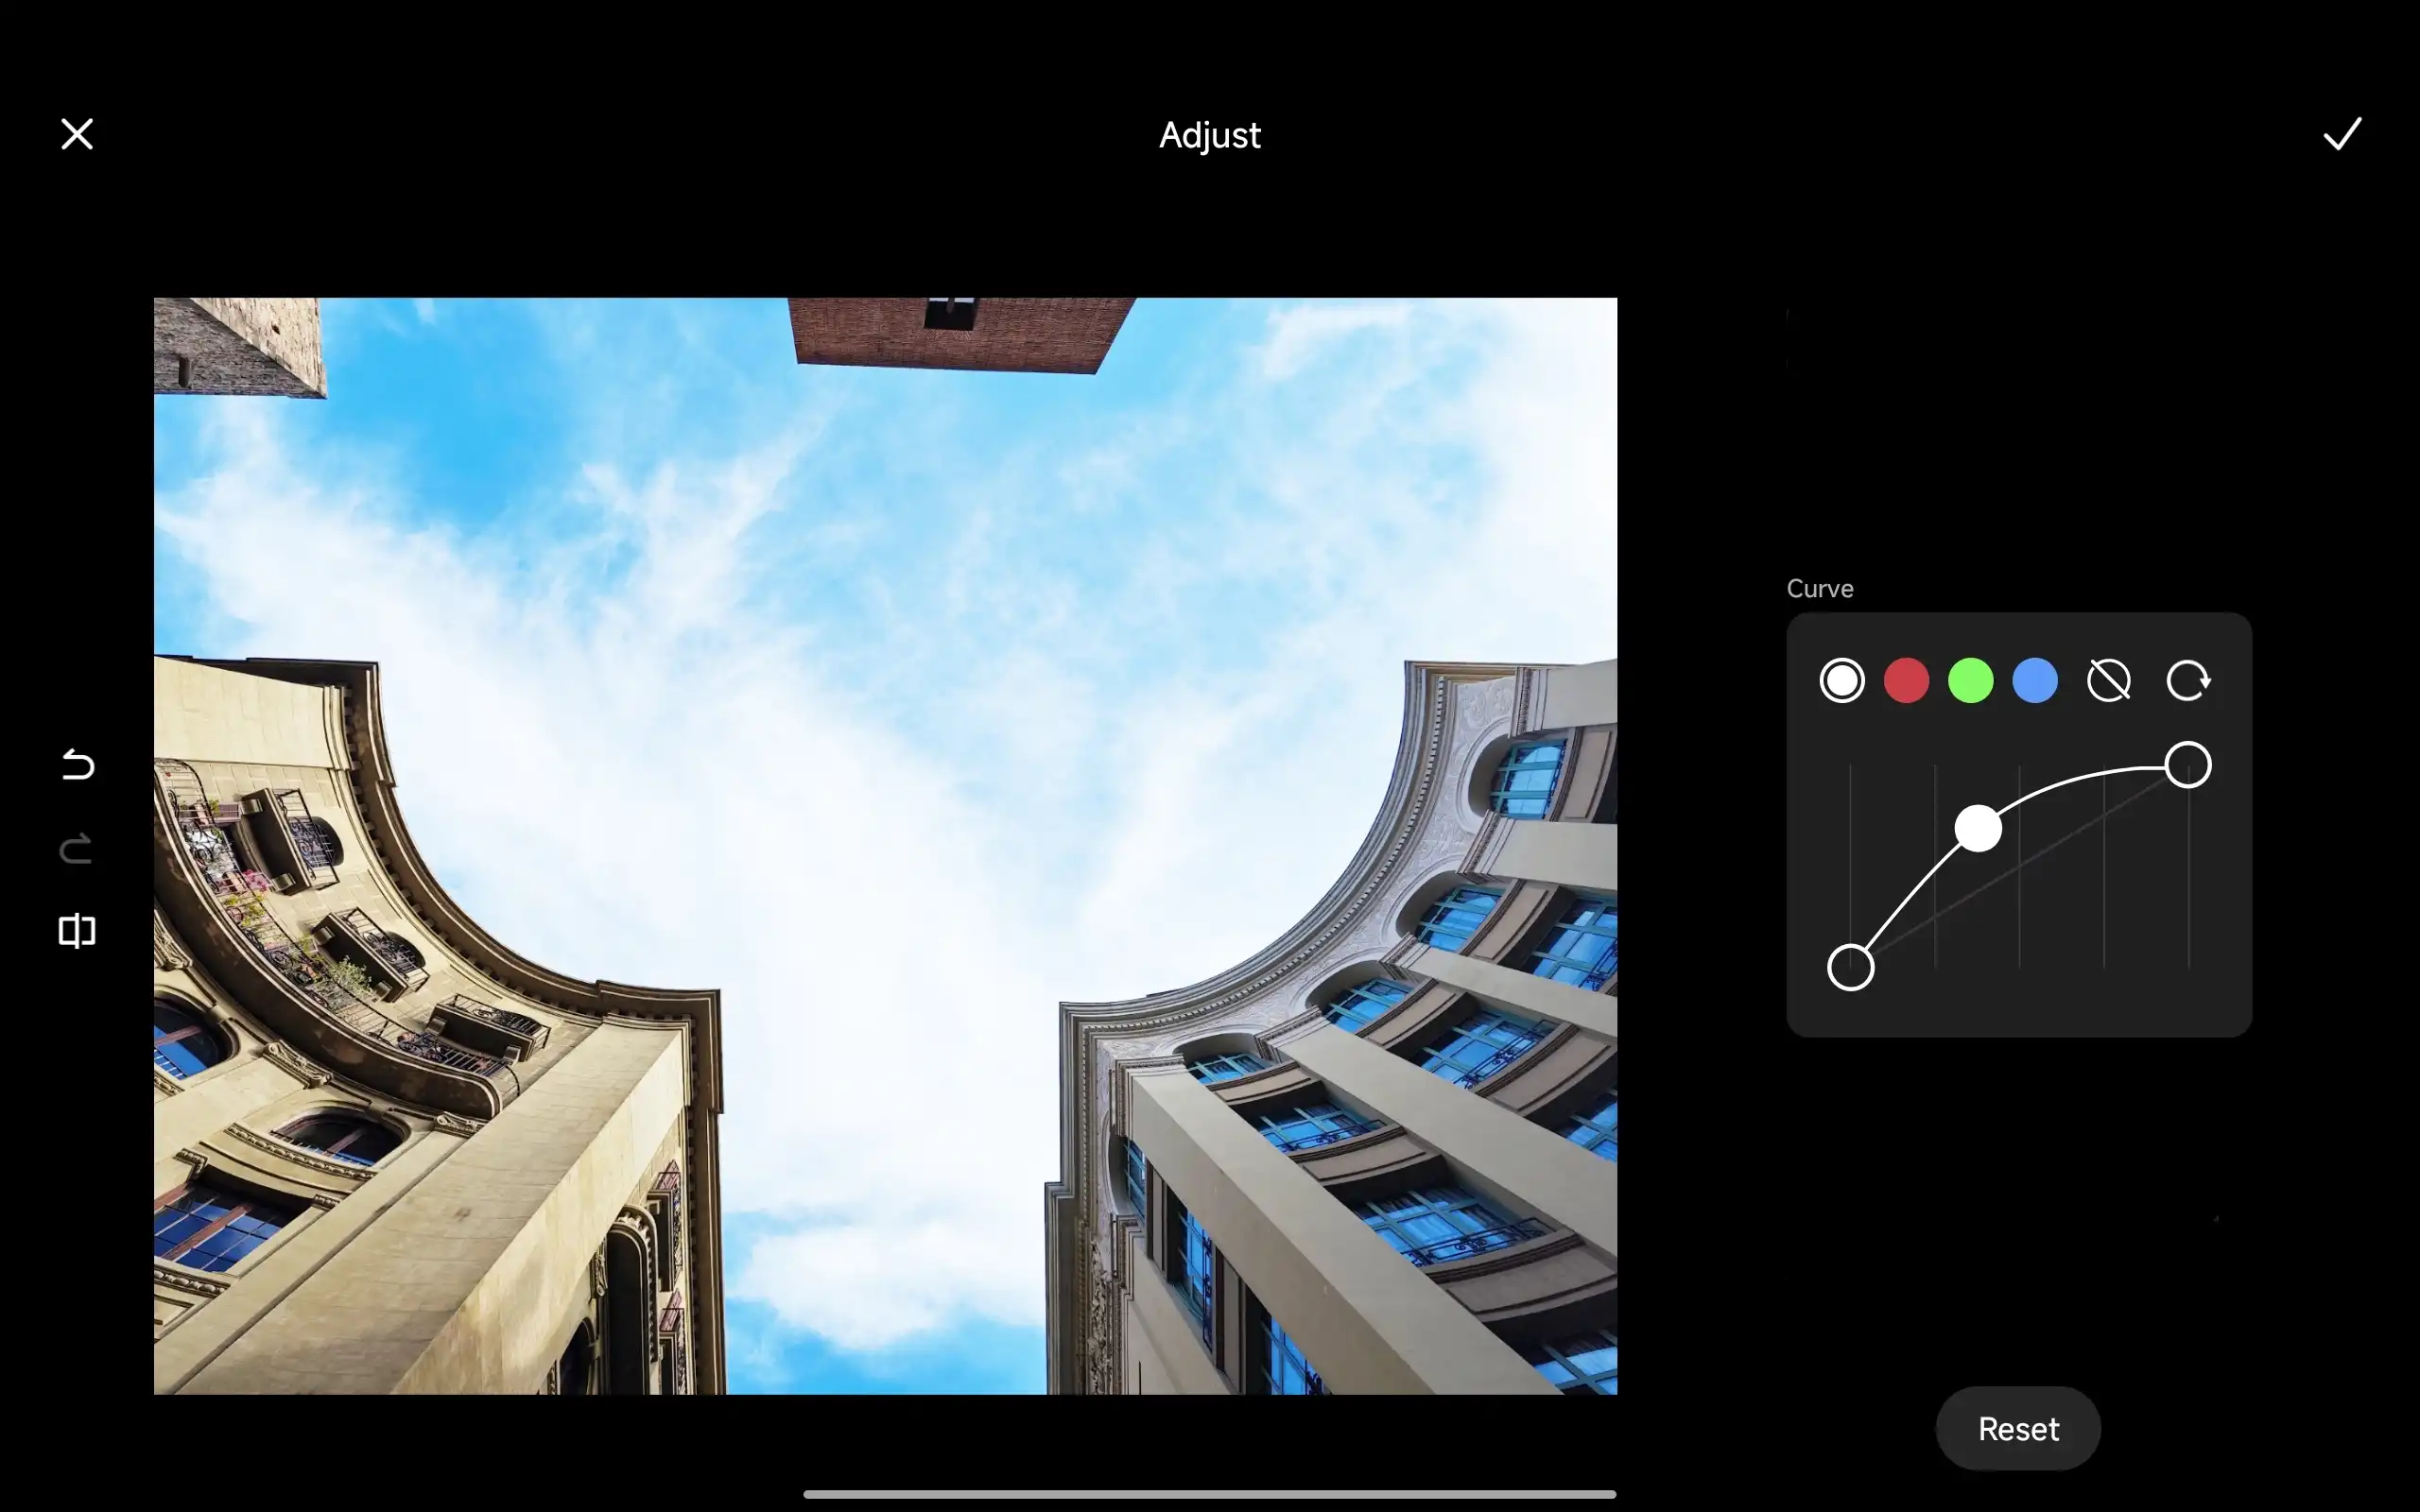
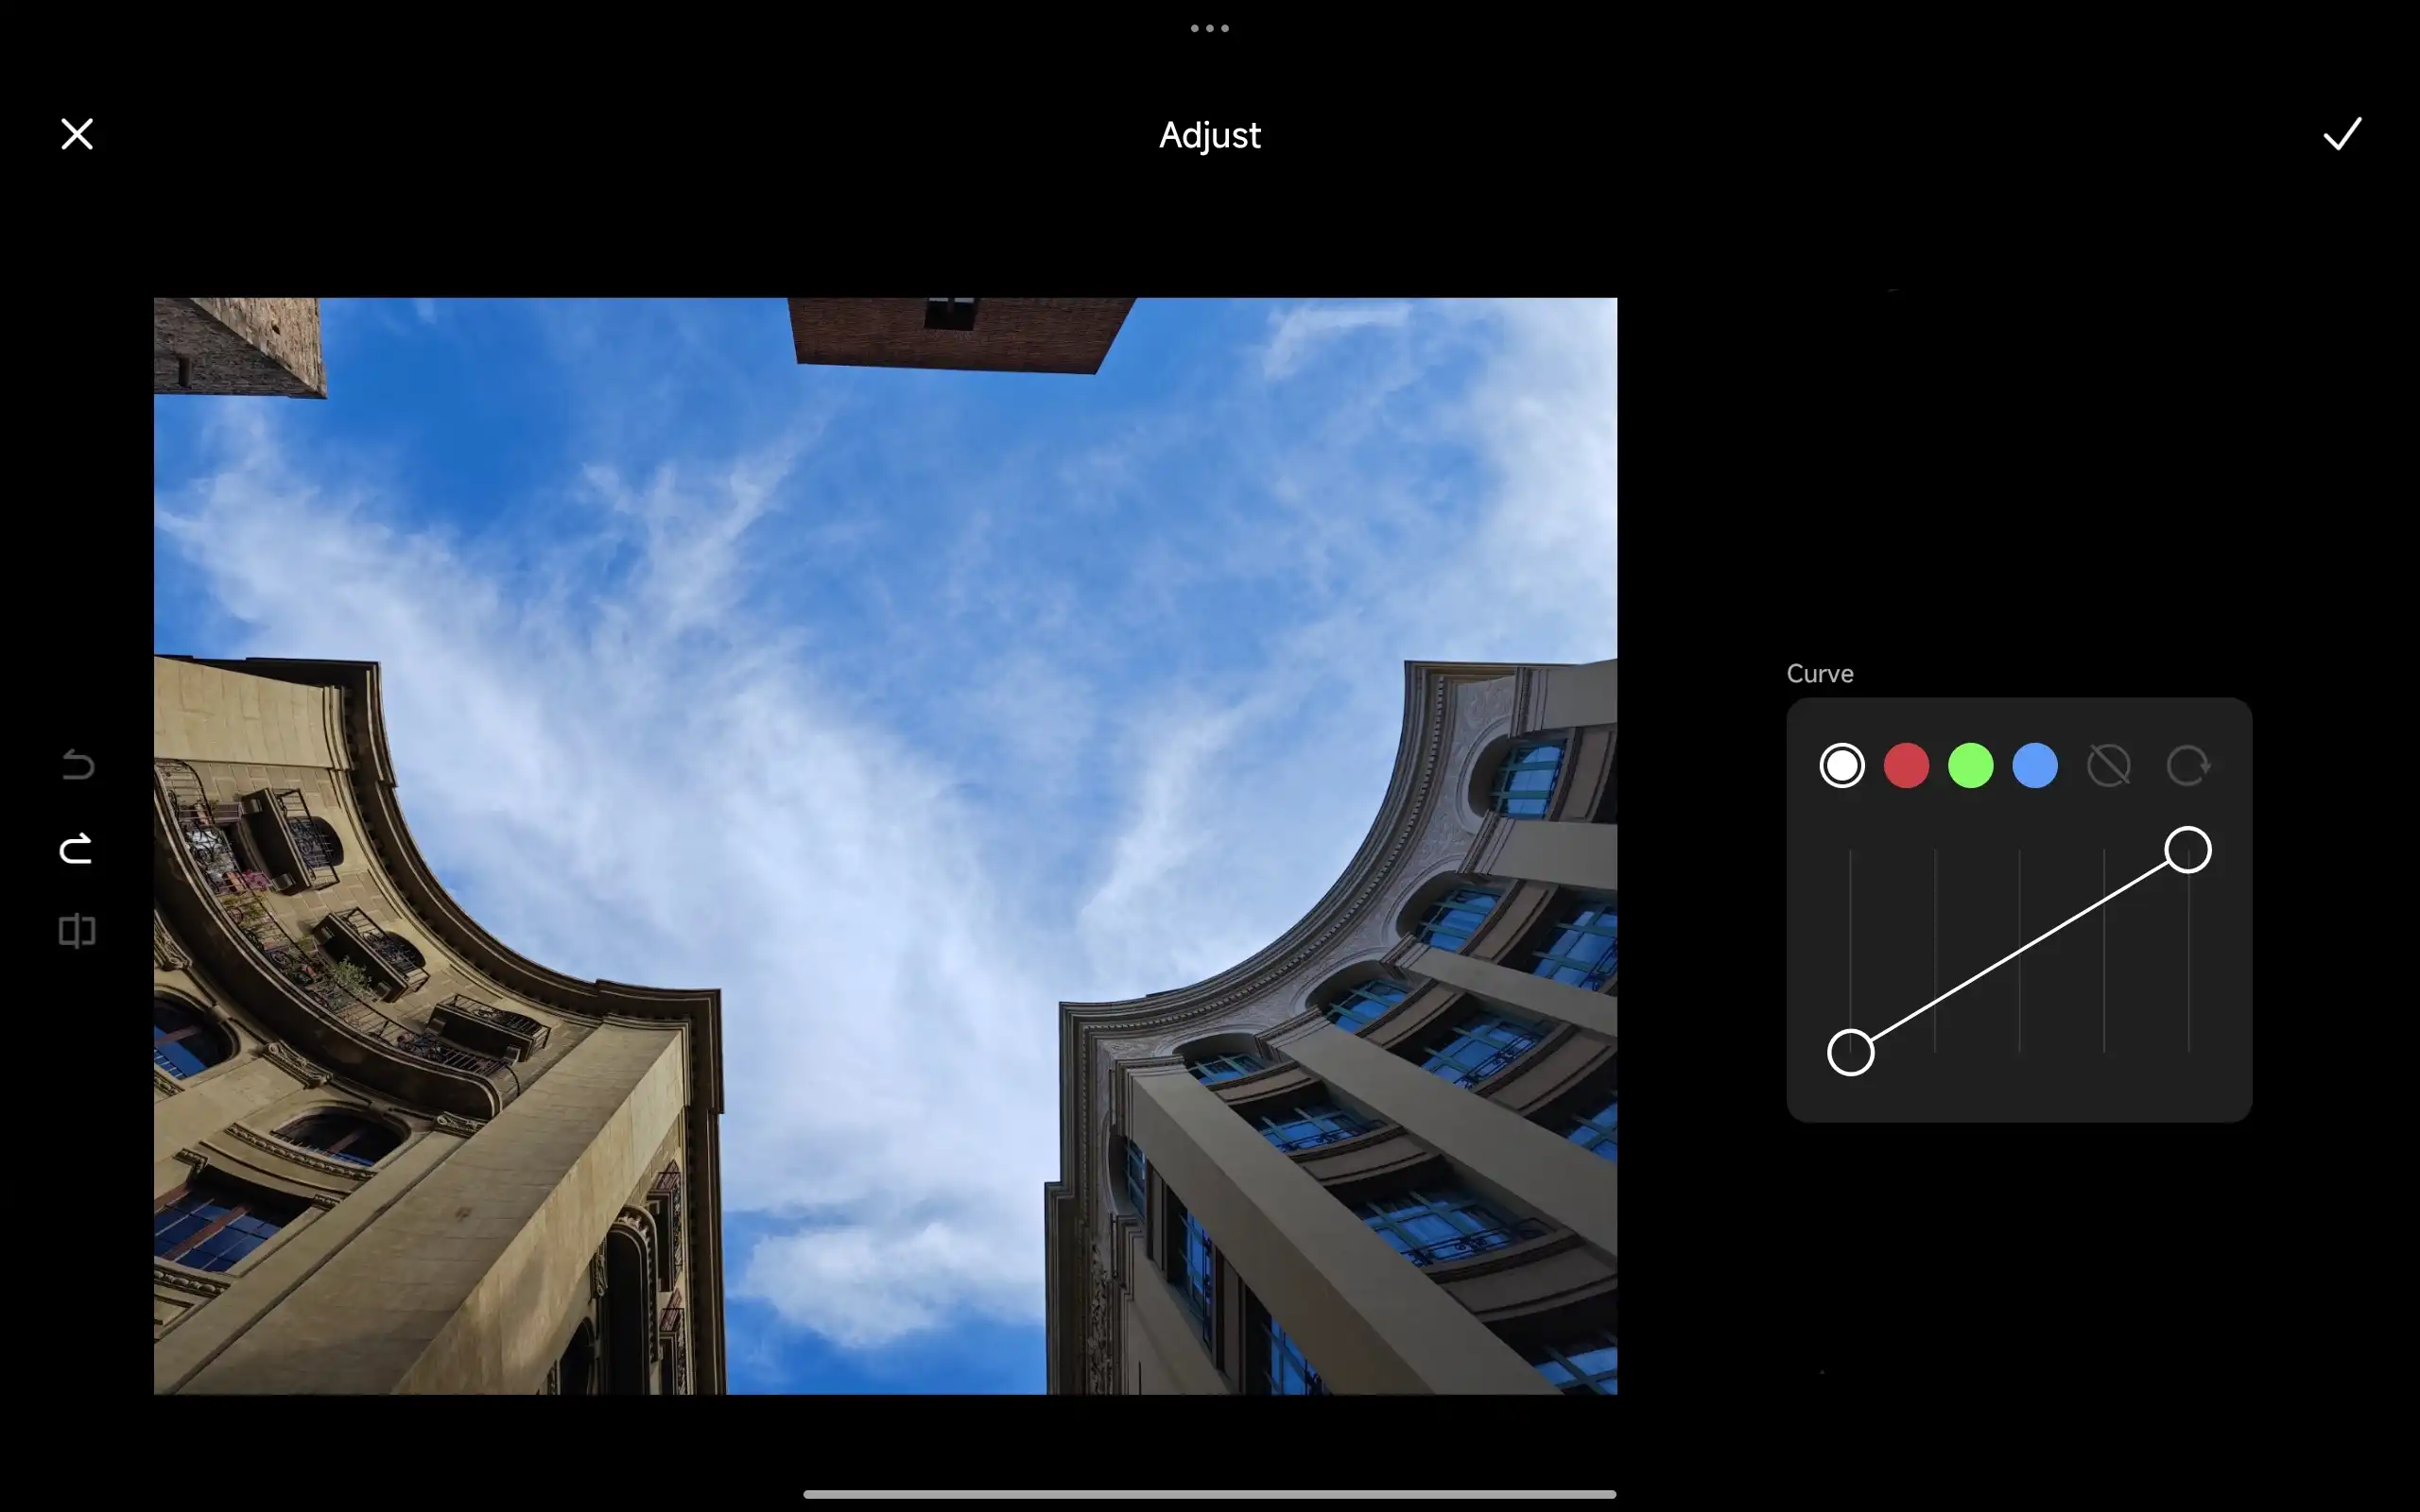
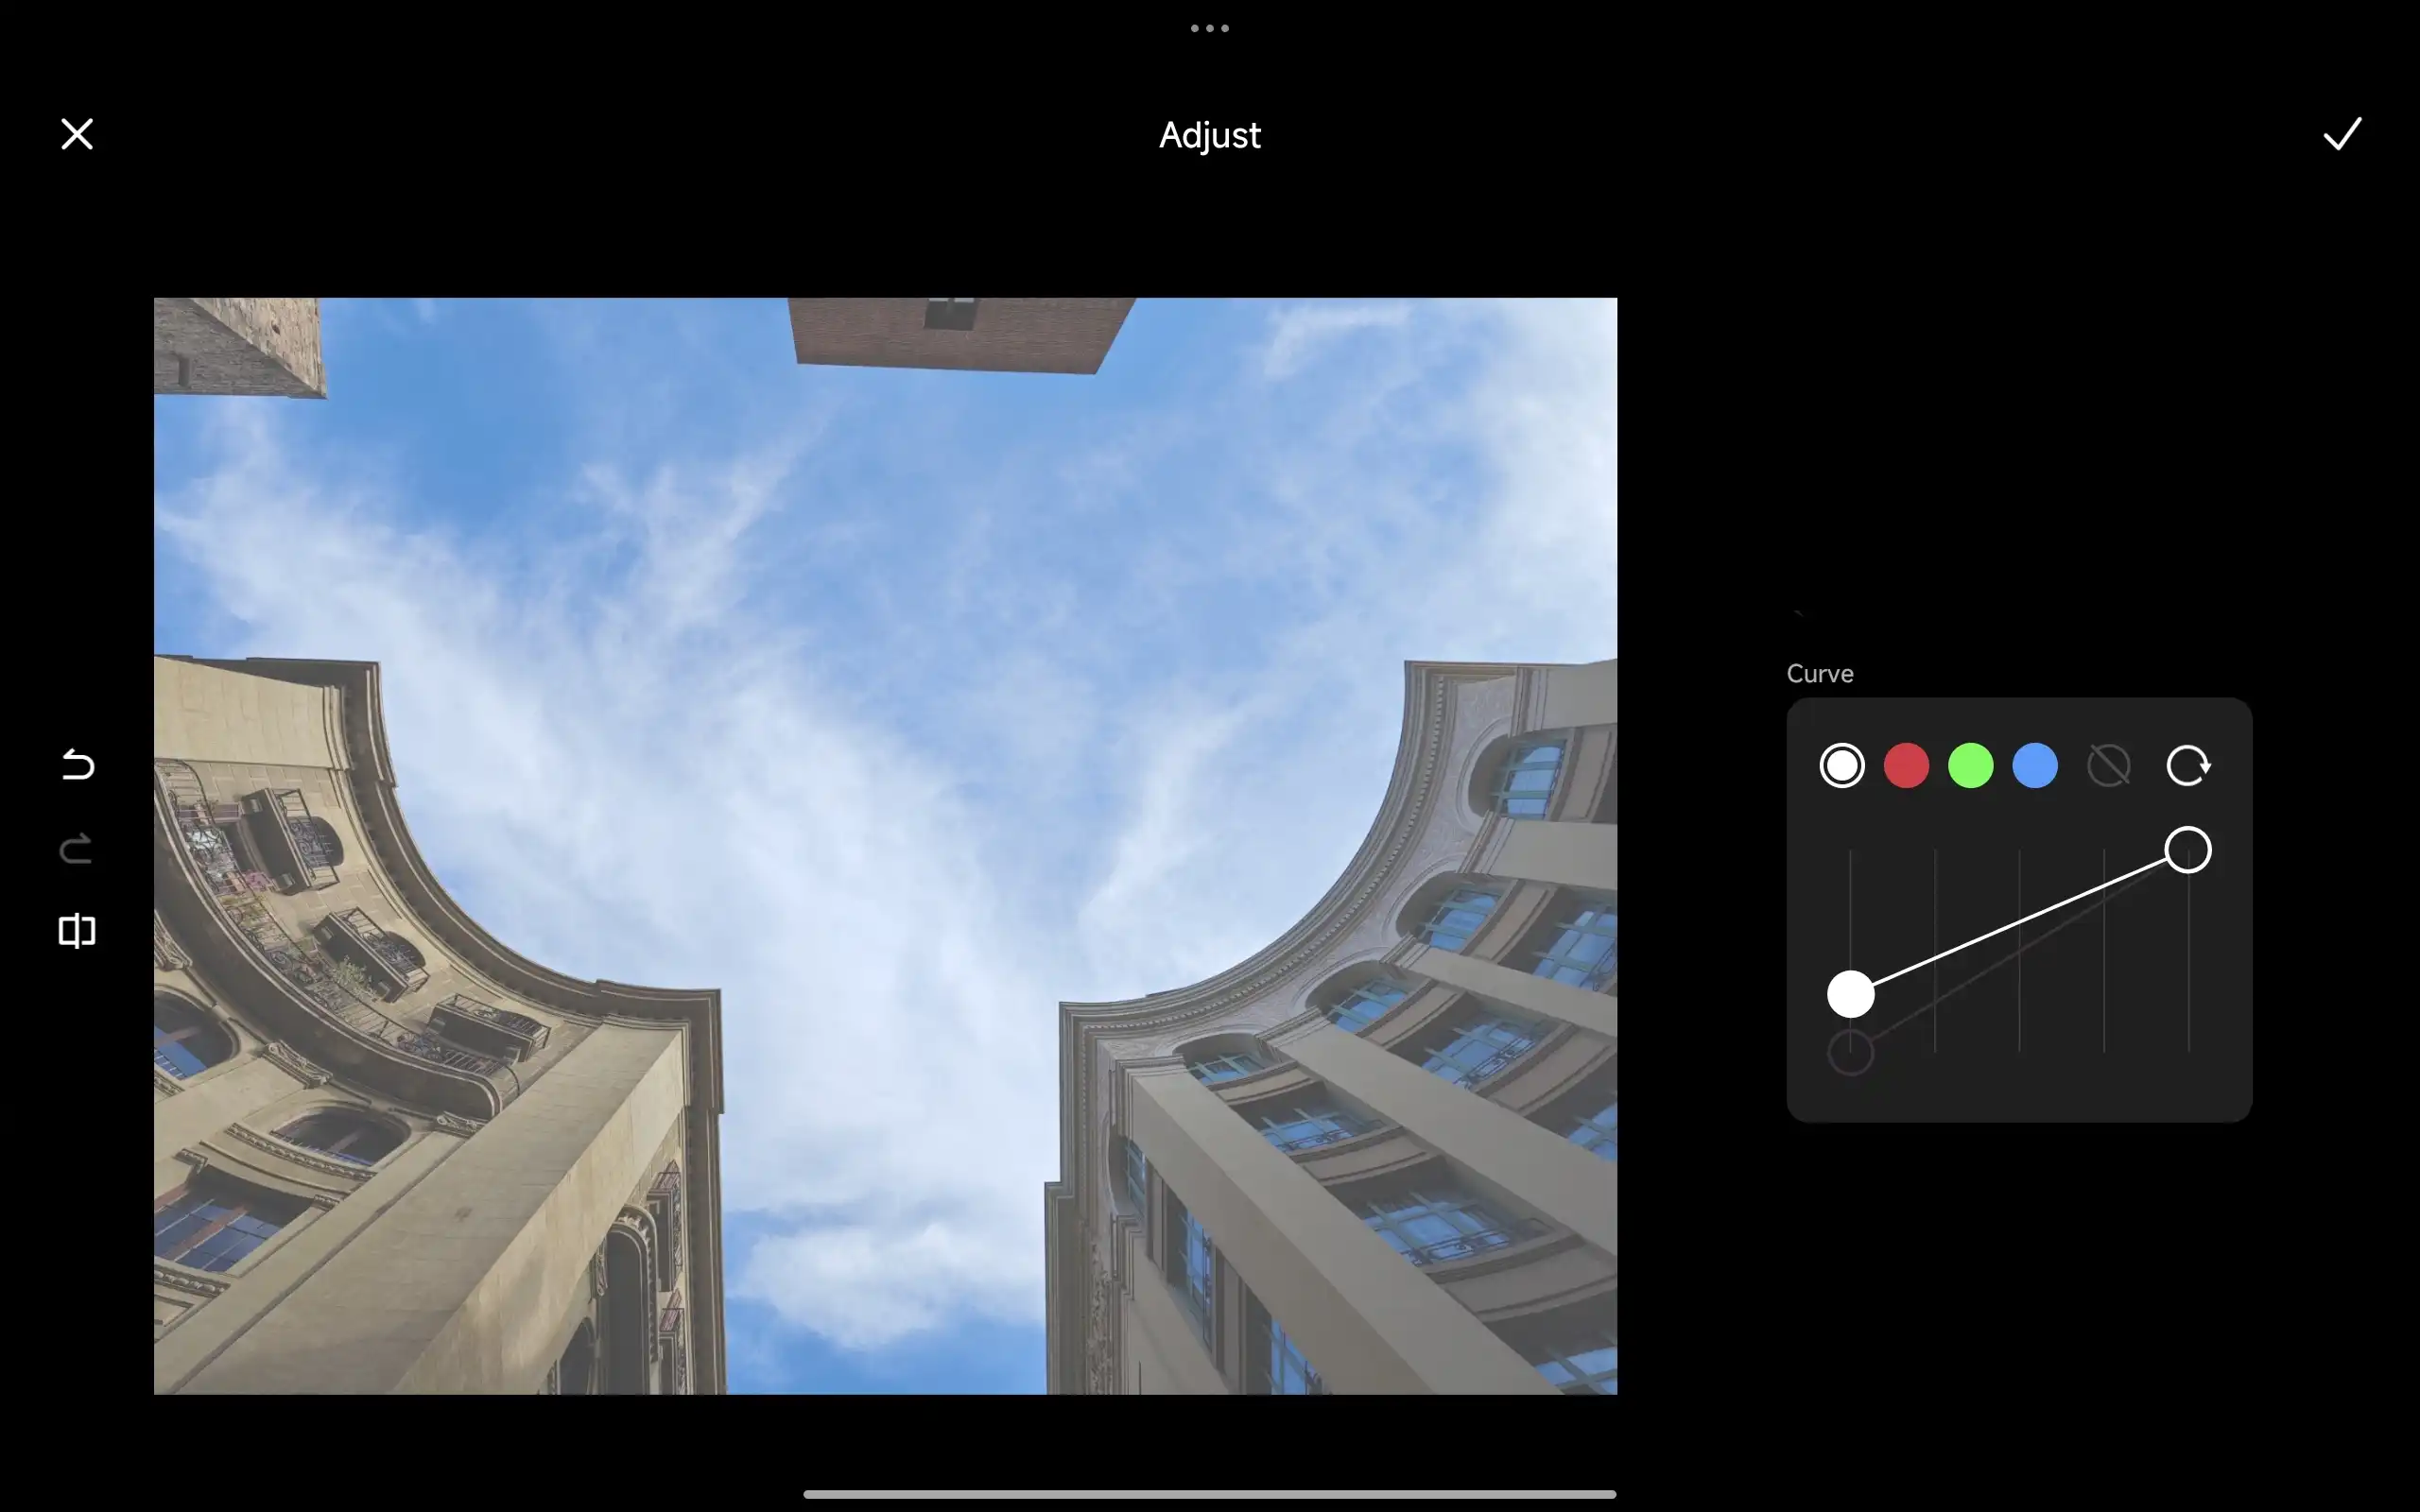
A Curves adjustment is often visualized as a graph. Typically, this graph features a diagonal line running from the bottom left to the top right. When this line remains straight, it signifies that no adjustments are being made to the image.
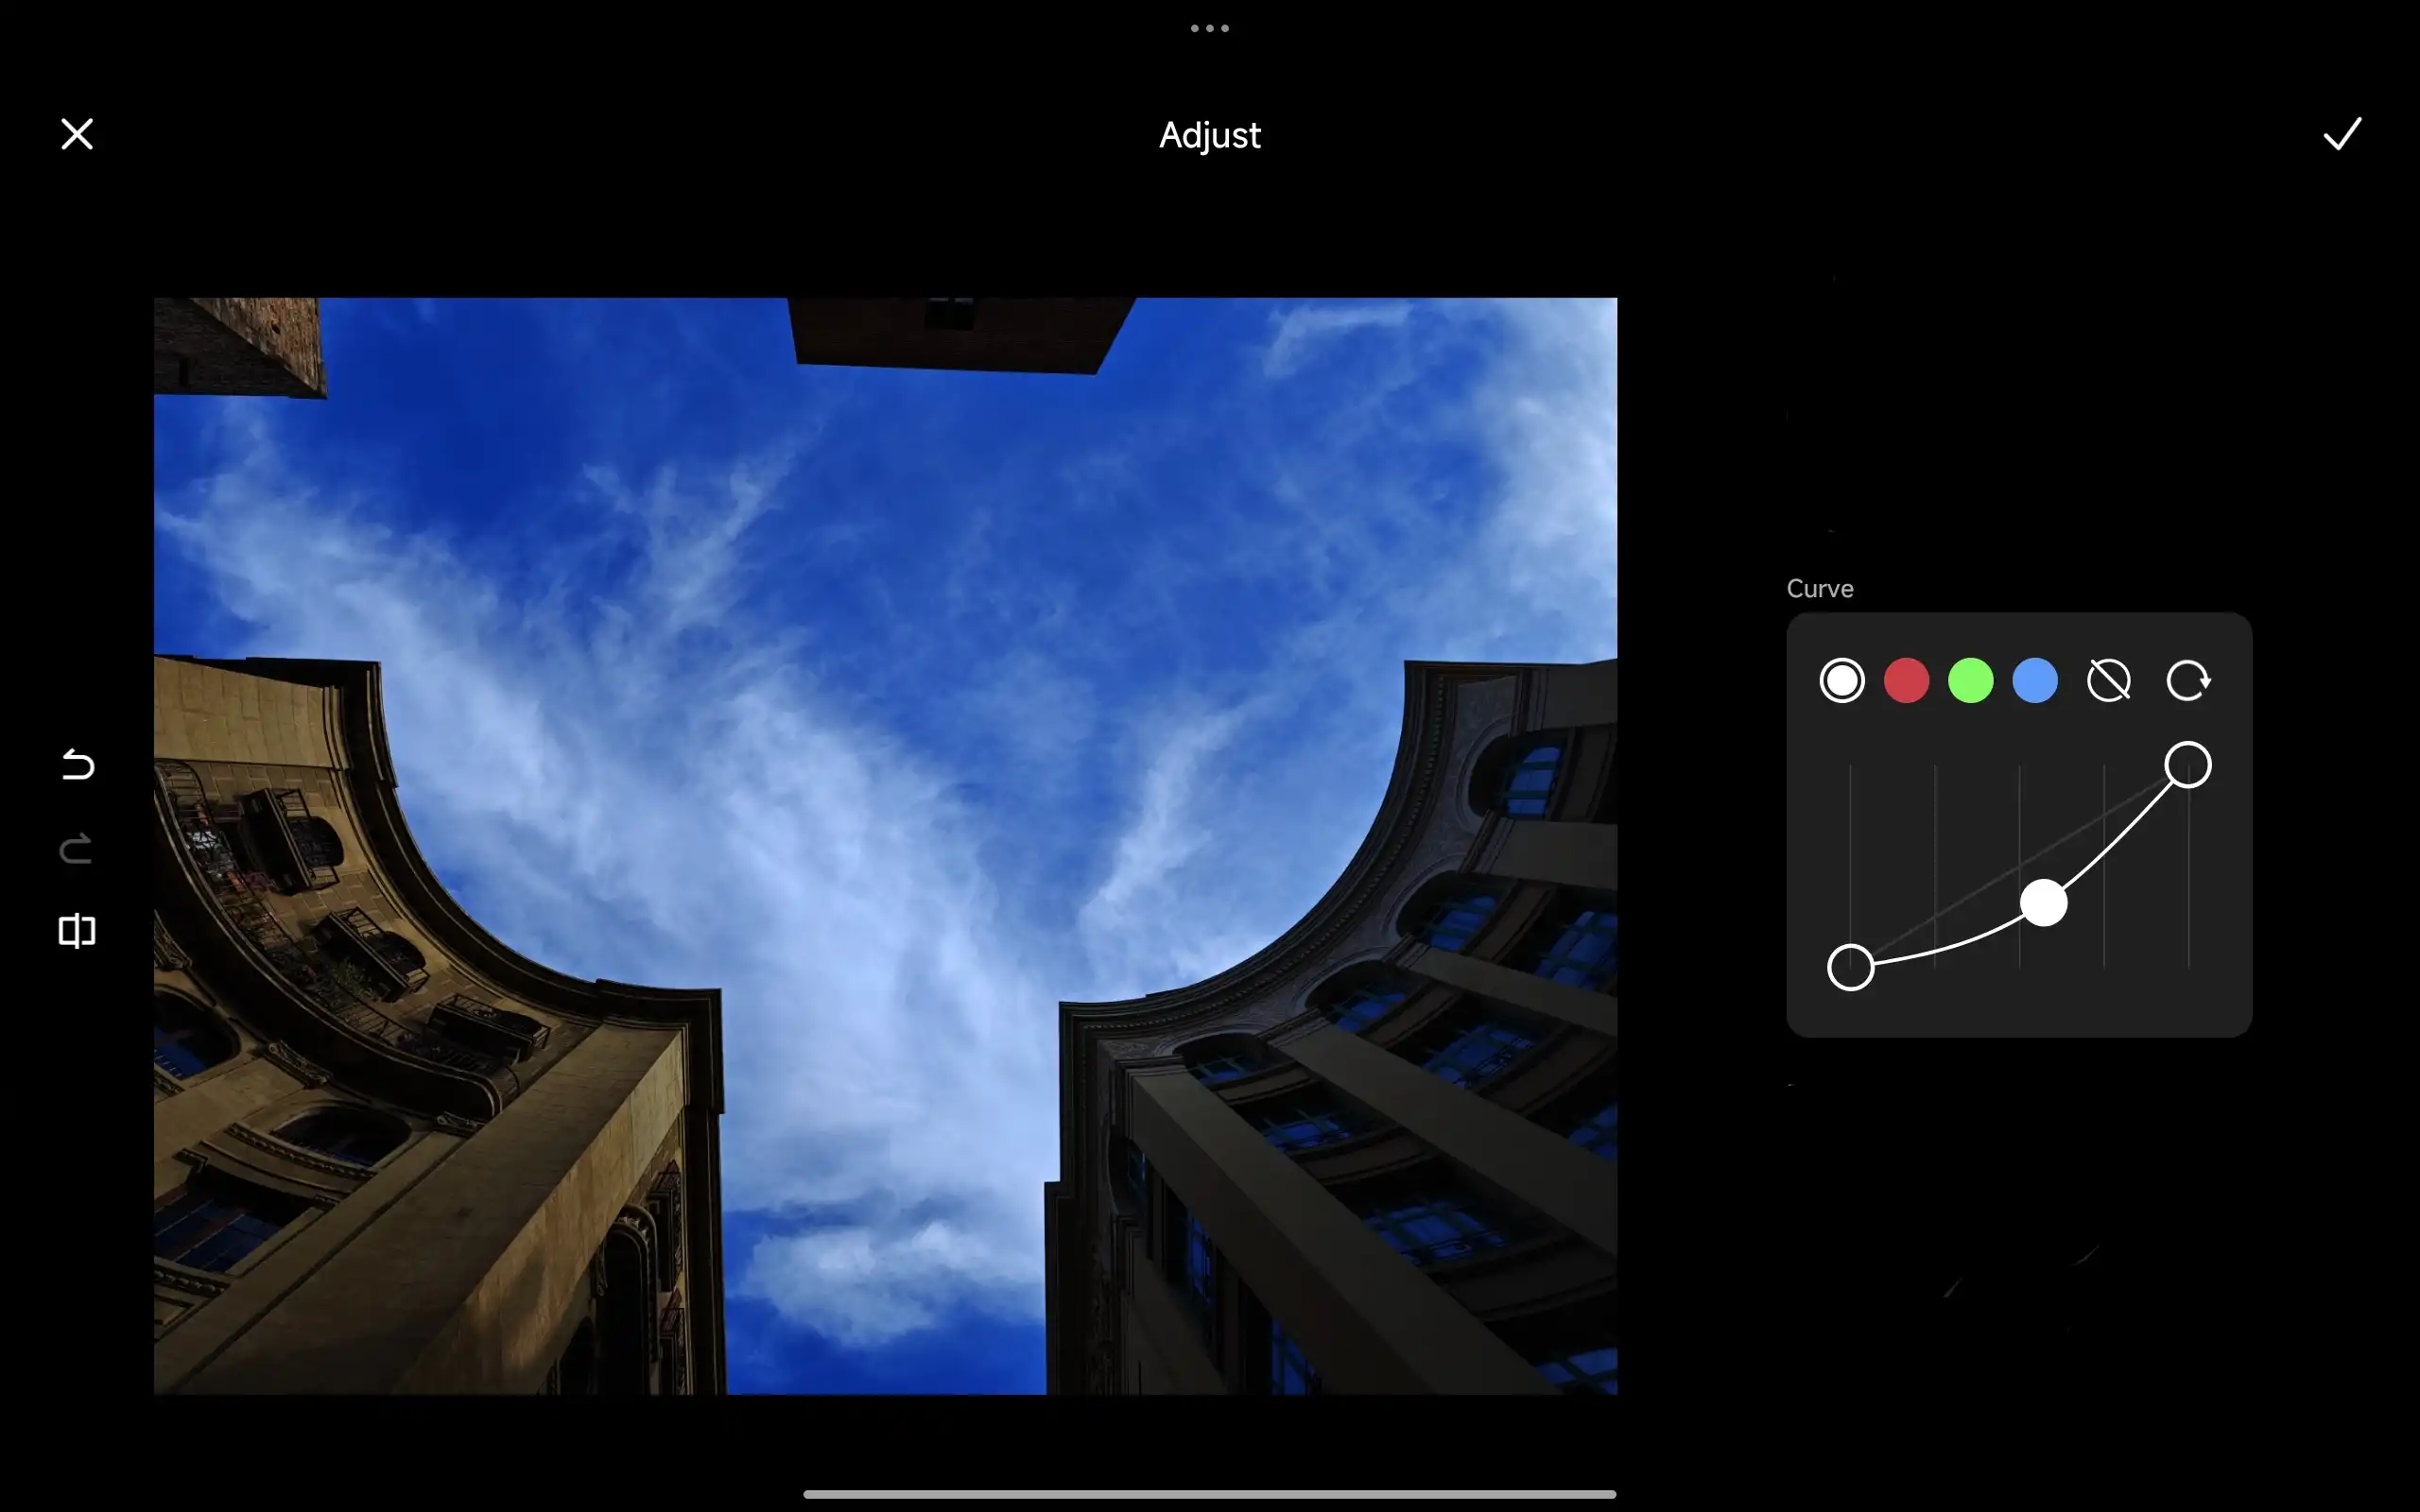
However, by manipulating this line, you can significantly alter the image's tonal range. To brighten an image, simply click and drag a point on the curve upwards. Conversely, to darken an image, click and drag a point downwards.
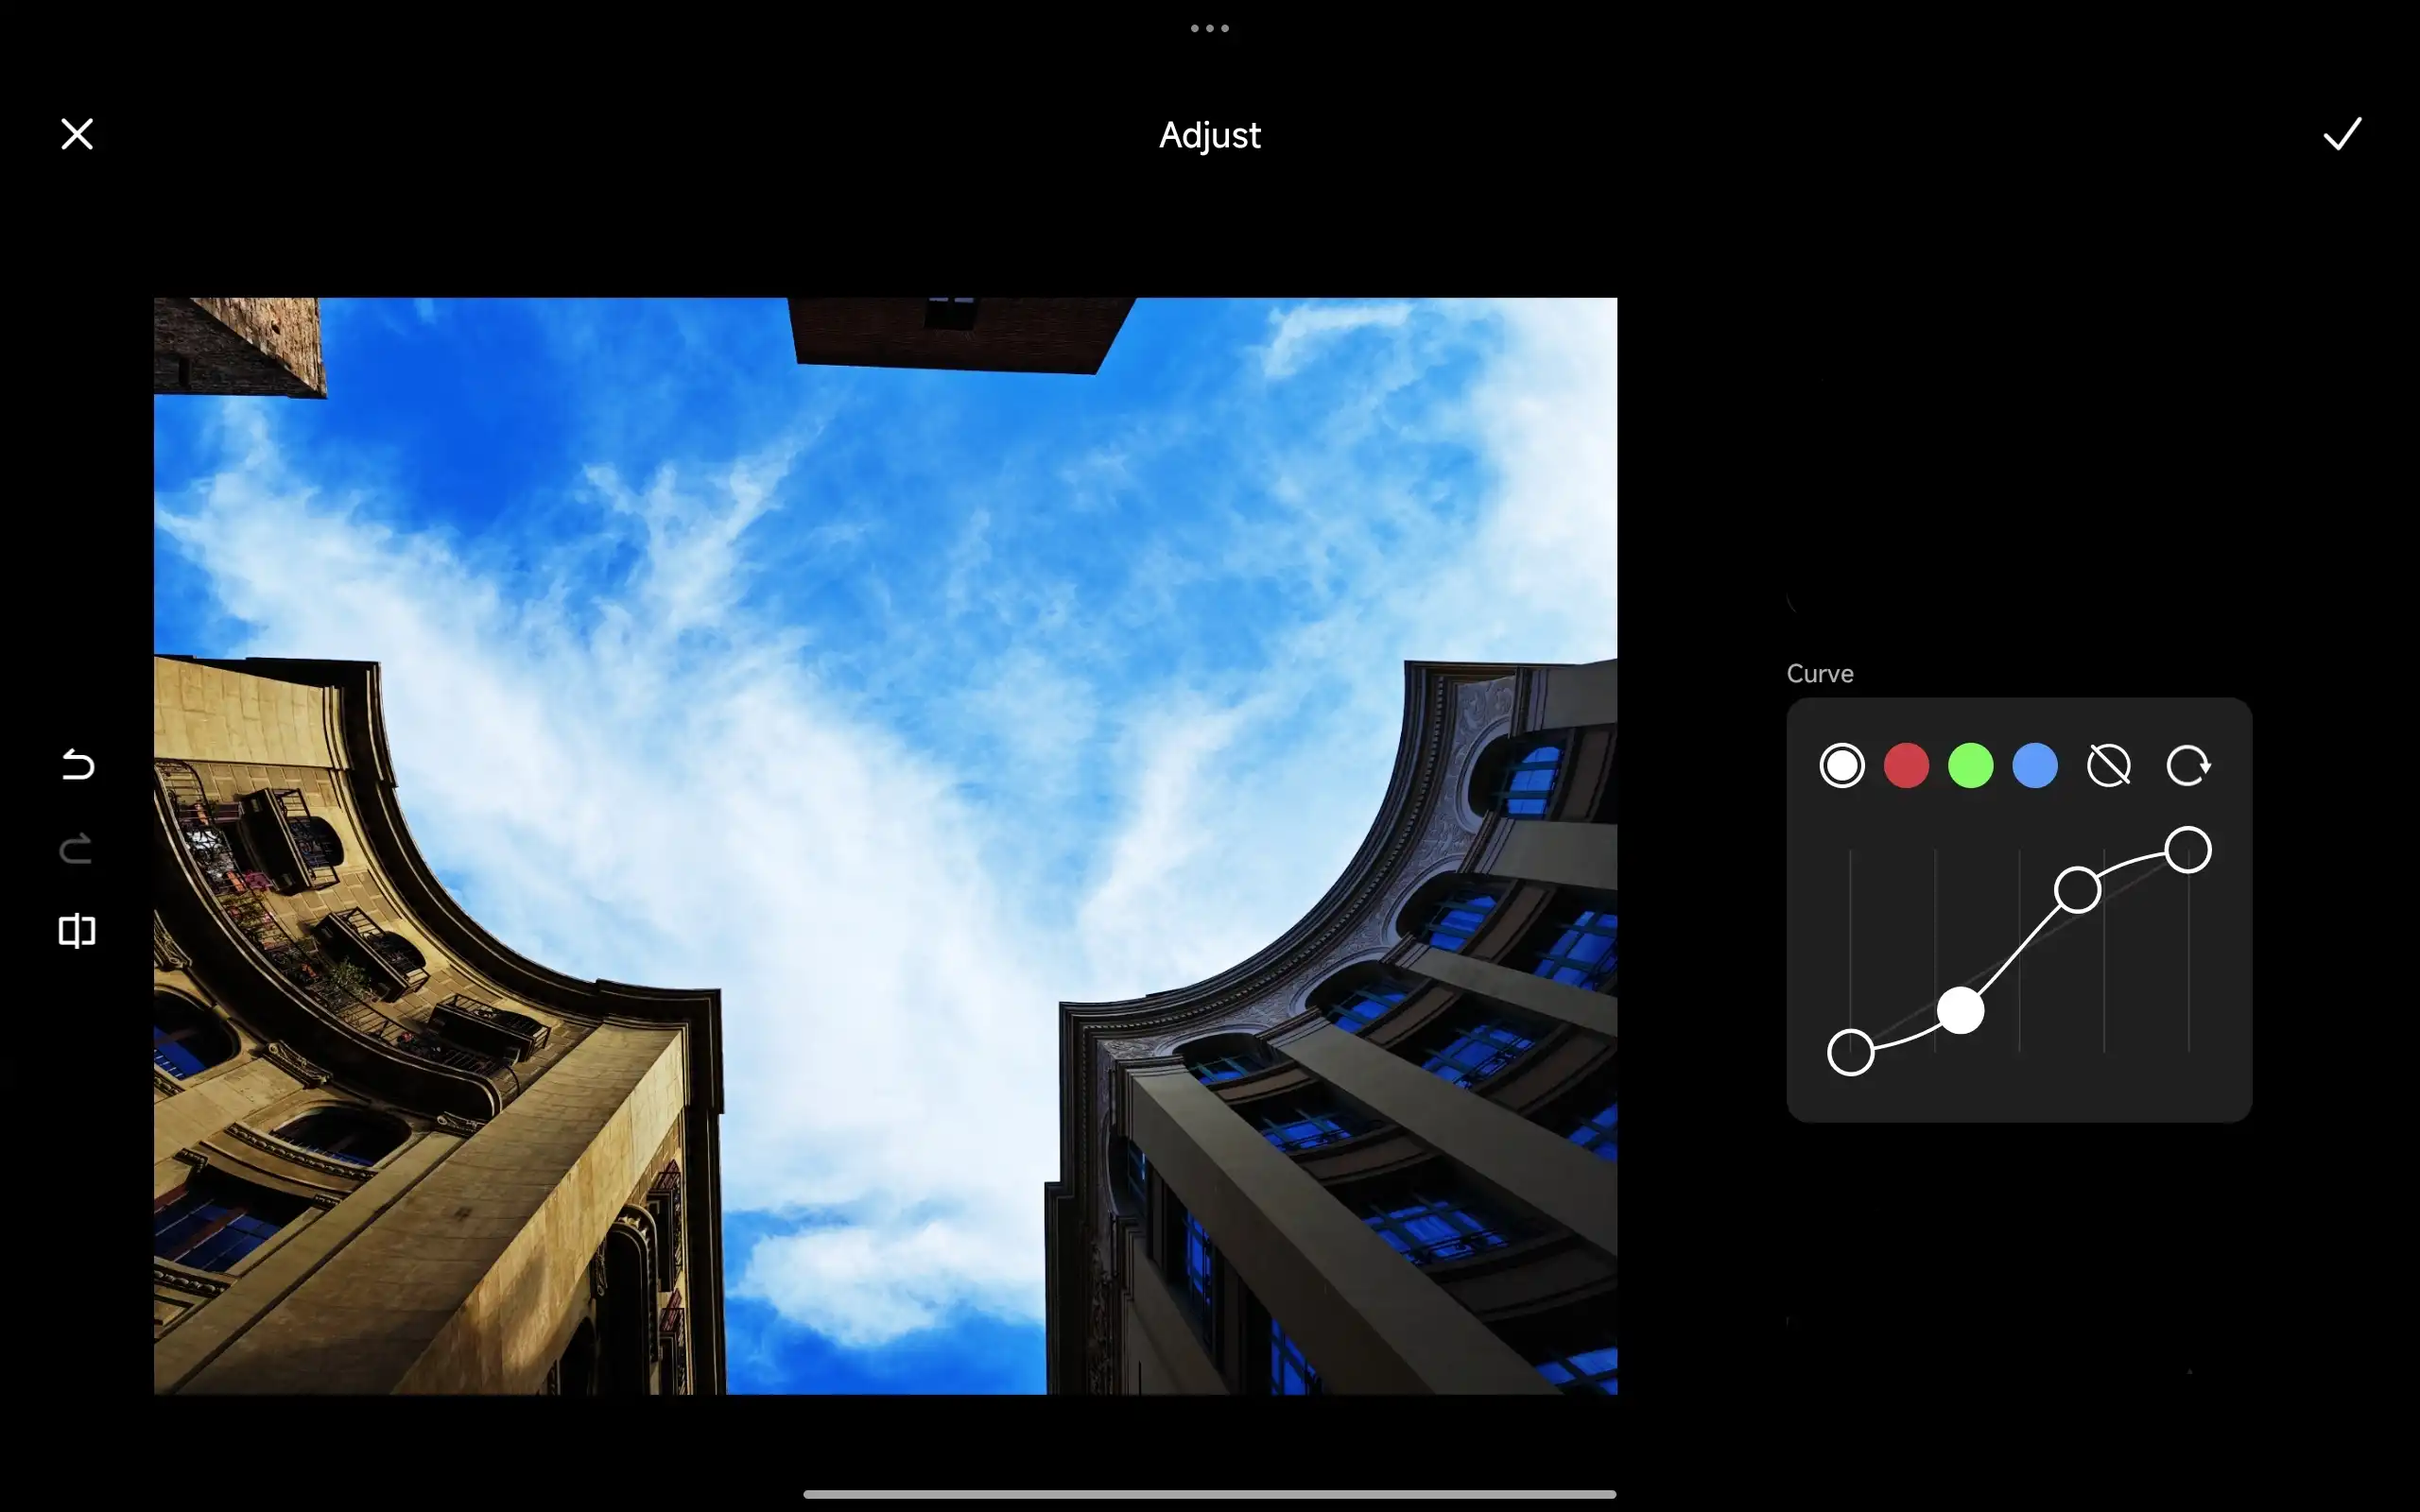
Add contrast with an “S” curve
One of the most effective methods to enhance contrast in a photo is by employing an "S-curve" adjustment. To achieve this, you can click and drag the curve line upwards in the upper-right quadrant and downwards in the lower-left quadrant. The more pronounced the "S" shape, the greater the increase in contrast within your image.
Create a “matte” effect
To achieve a popular matte effect, we can manipulate the curves in our photo editing software. Start by selecting the point on the lower-left part of the curve line and gently pulling it upwards. This action reduces contrast, giving the image a softer, more muted appearance. To add a subtle touch of contrast back into the photo, consider introducing a gentle S-curve to the line. This refined approach balances the matte effect with a touch of definition, resulting in a visually appealing and harmonious image.


Changing color with curve adjustments
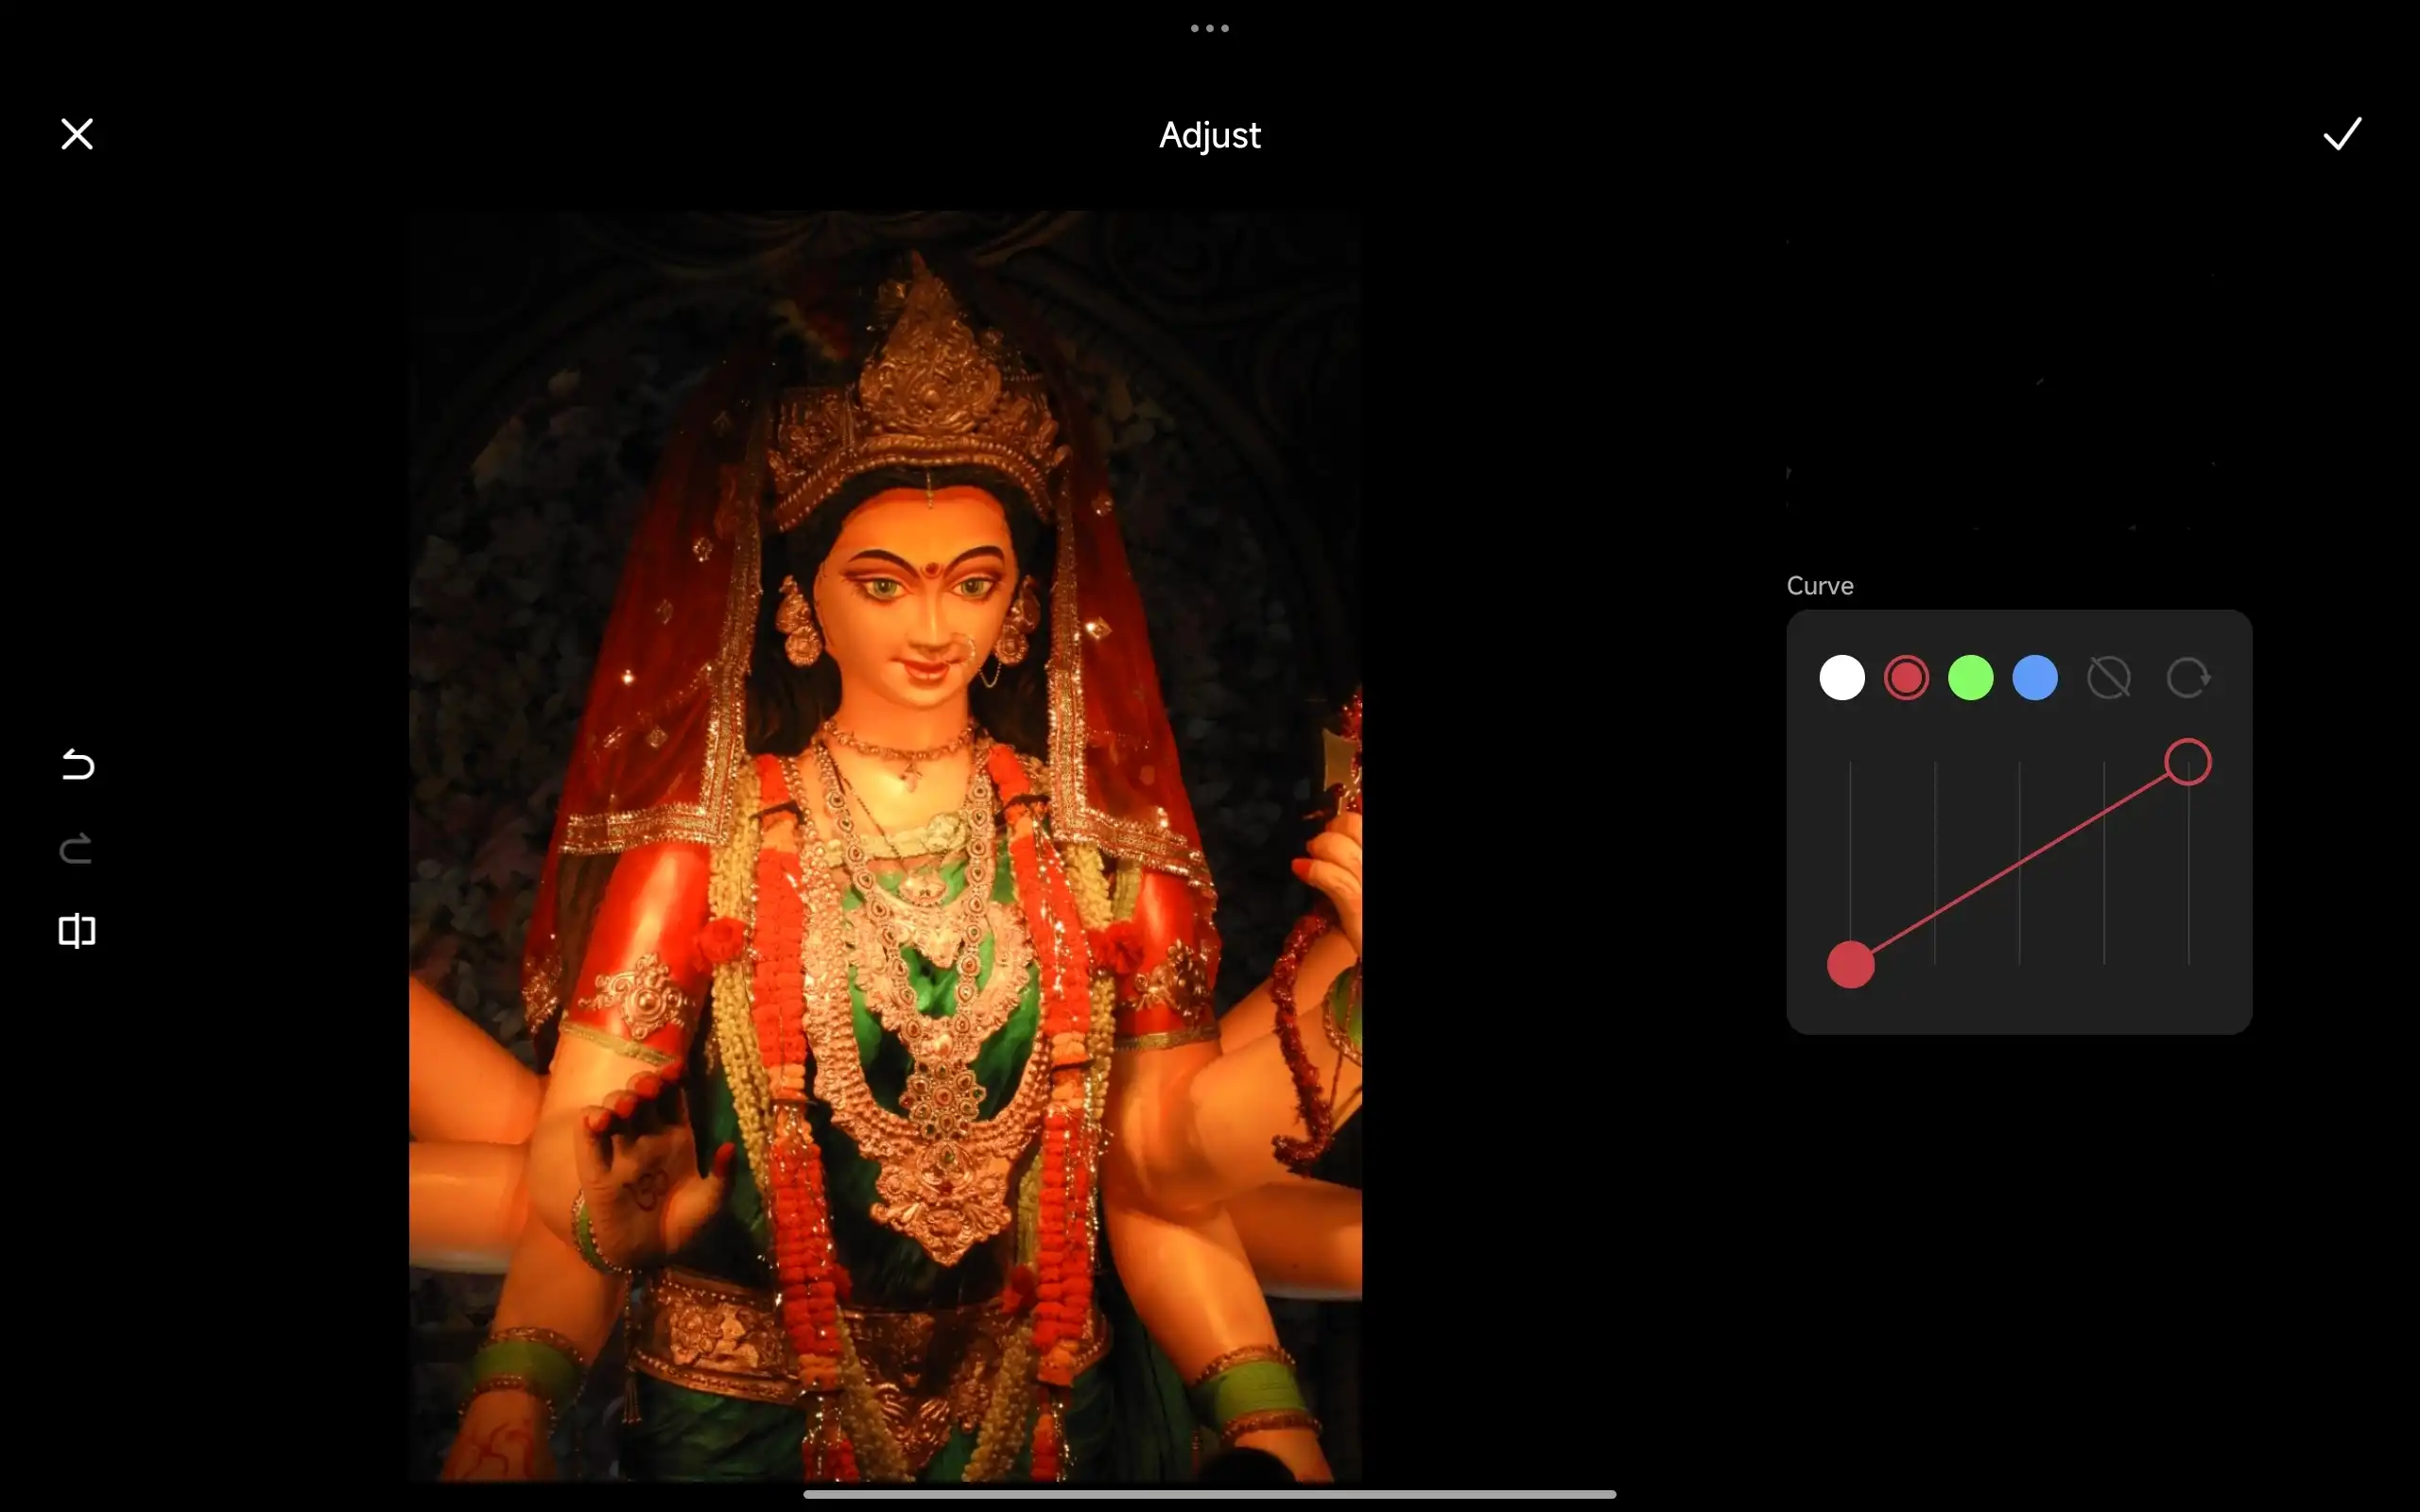
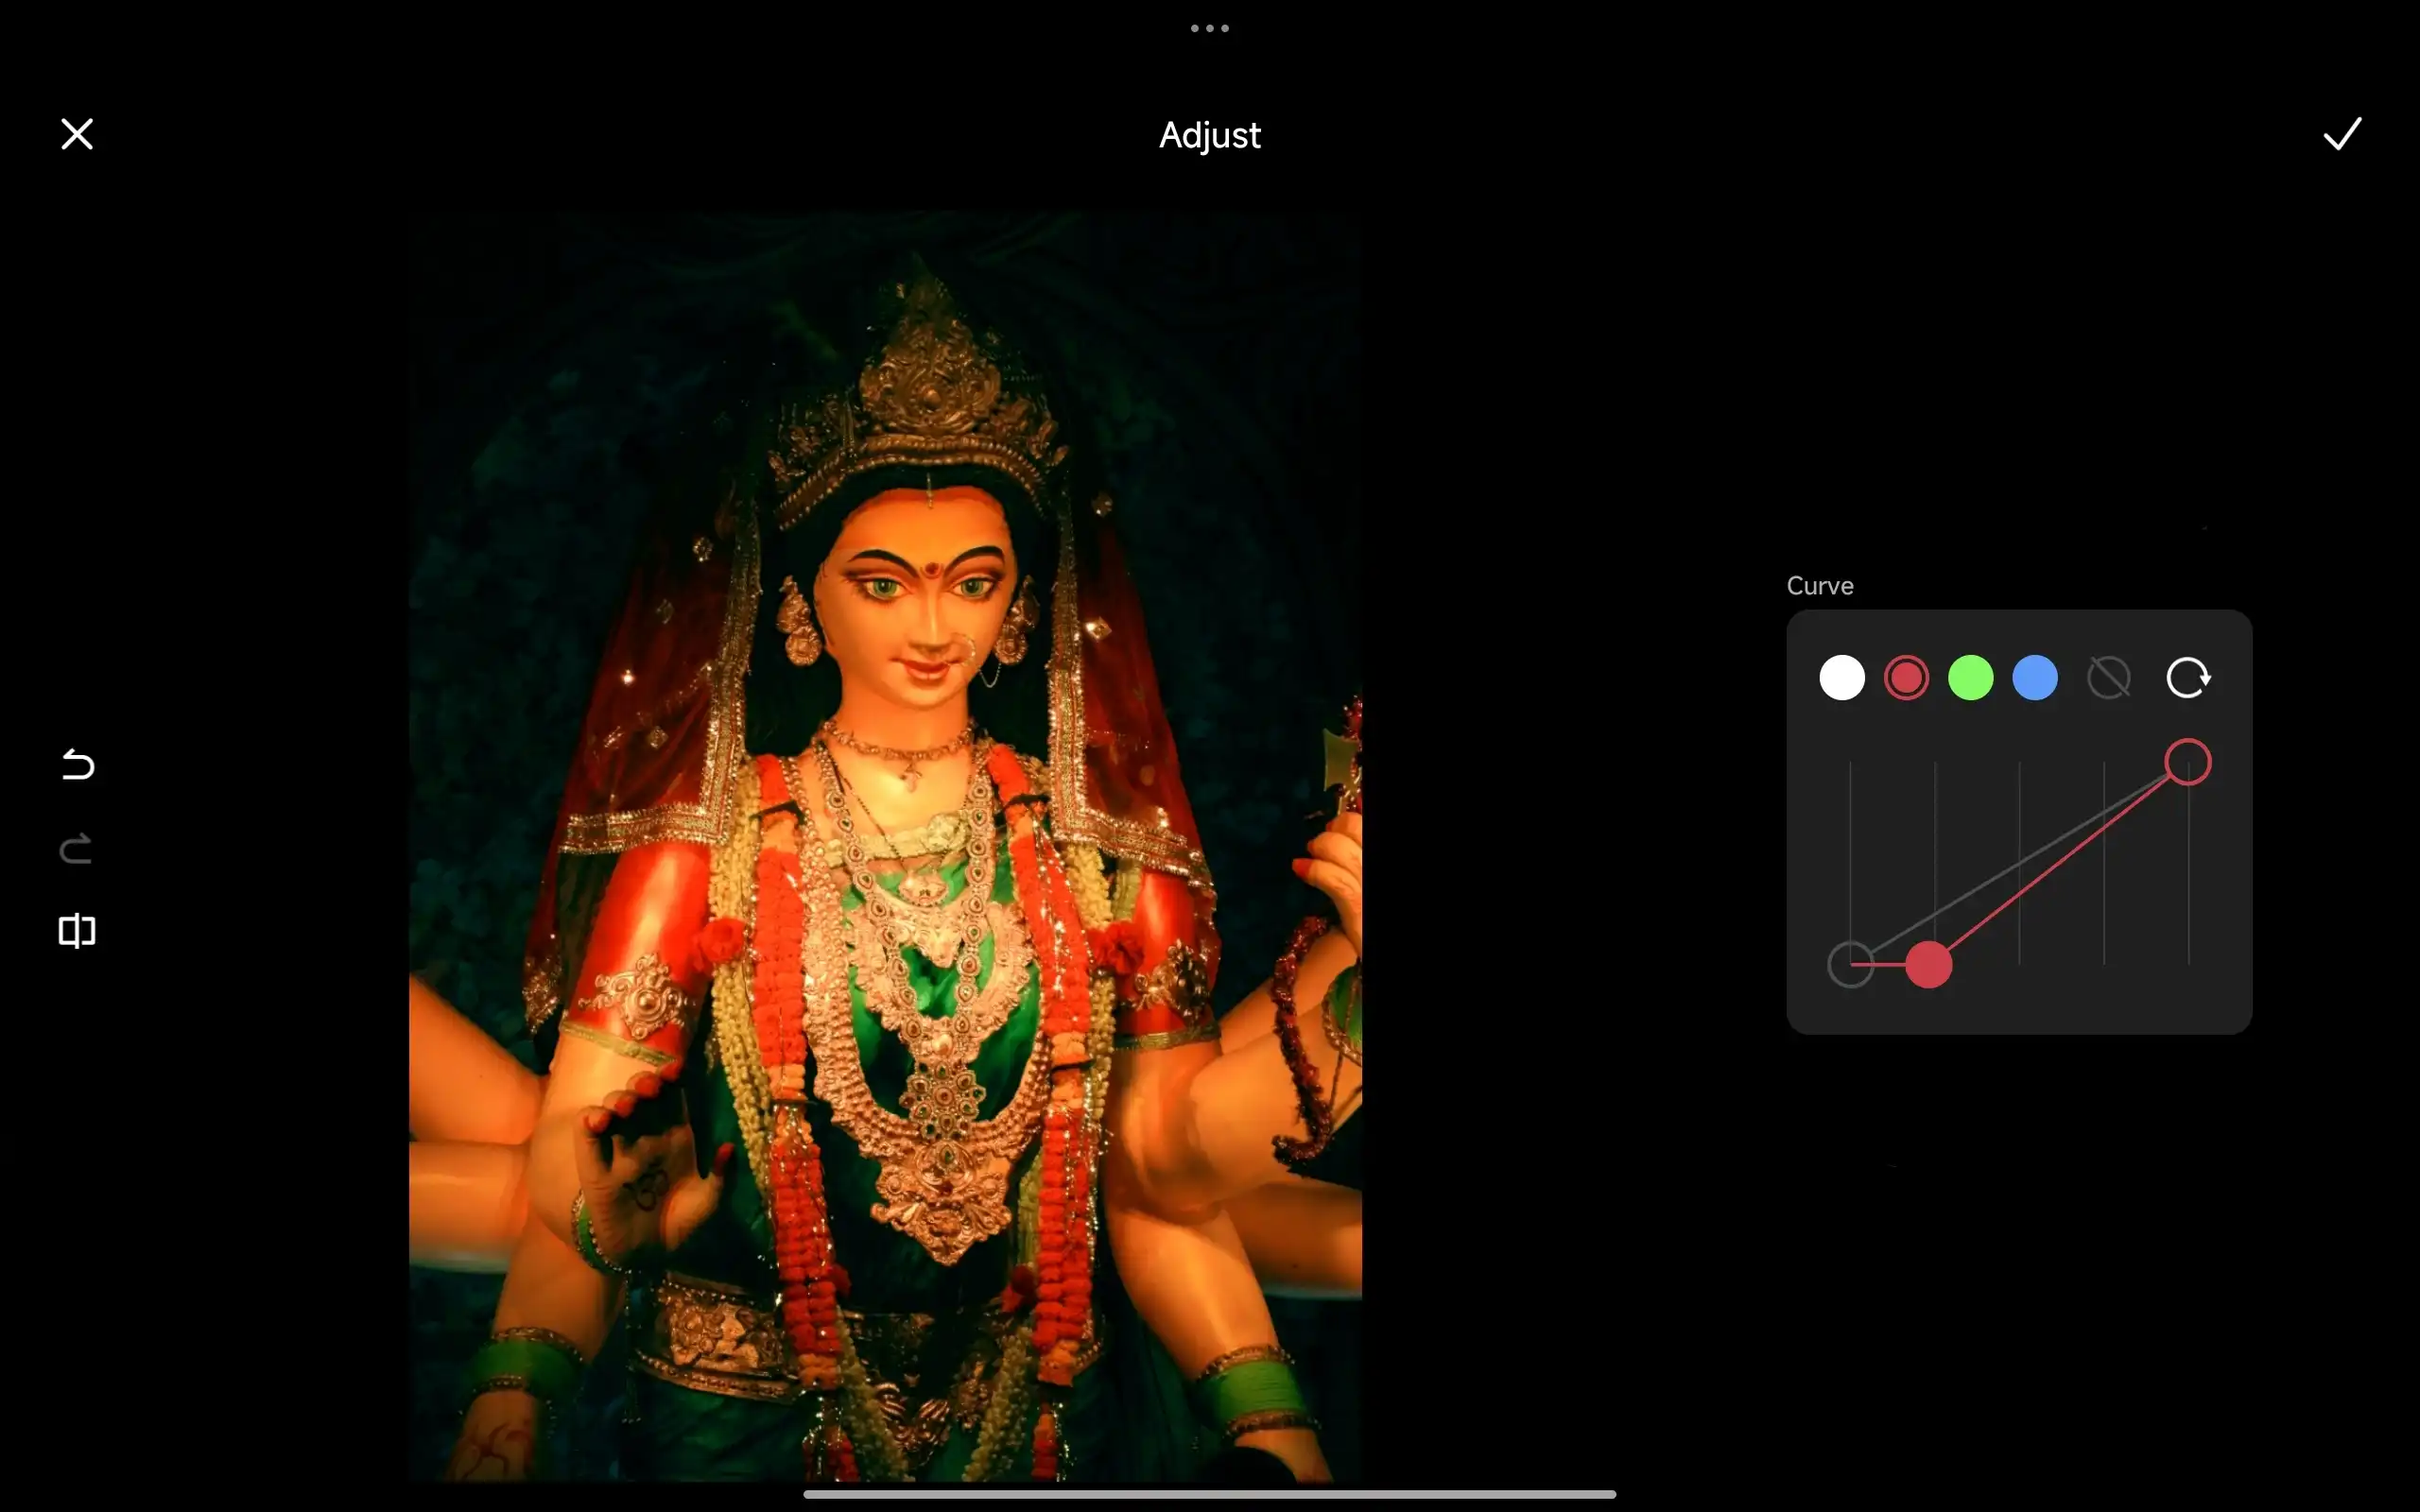
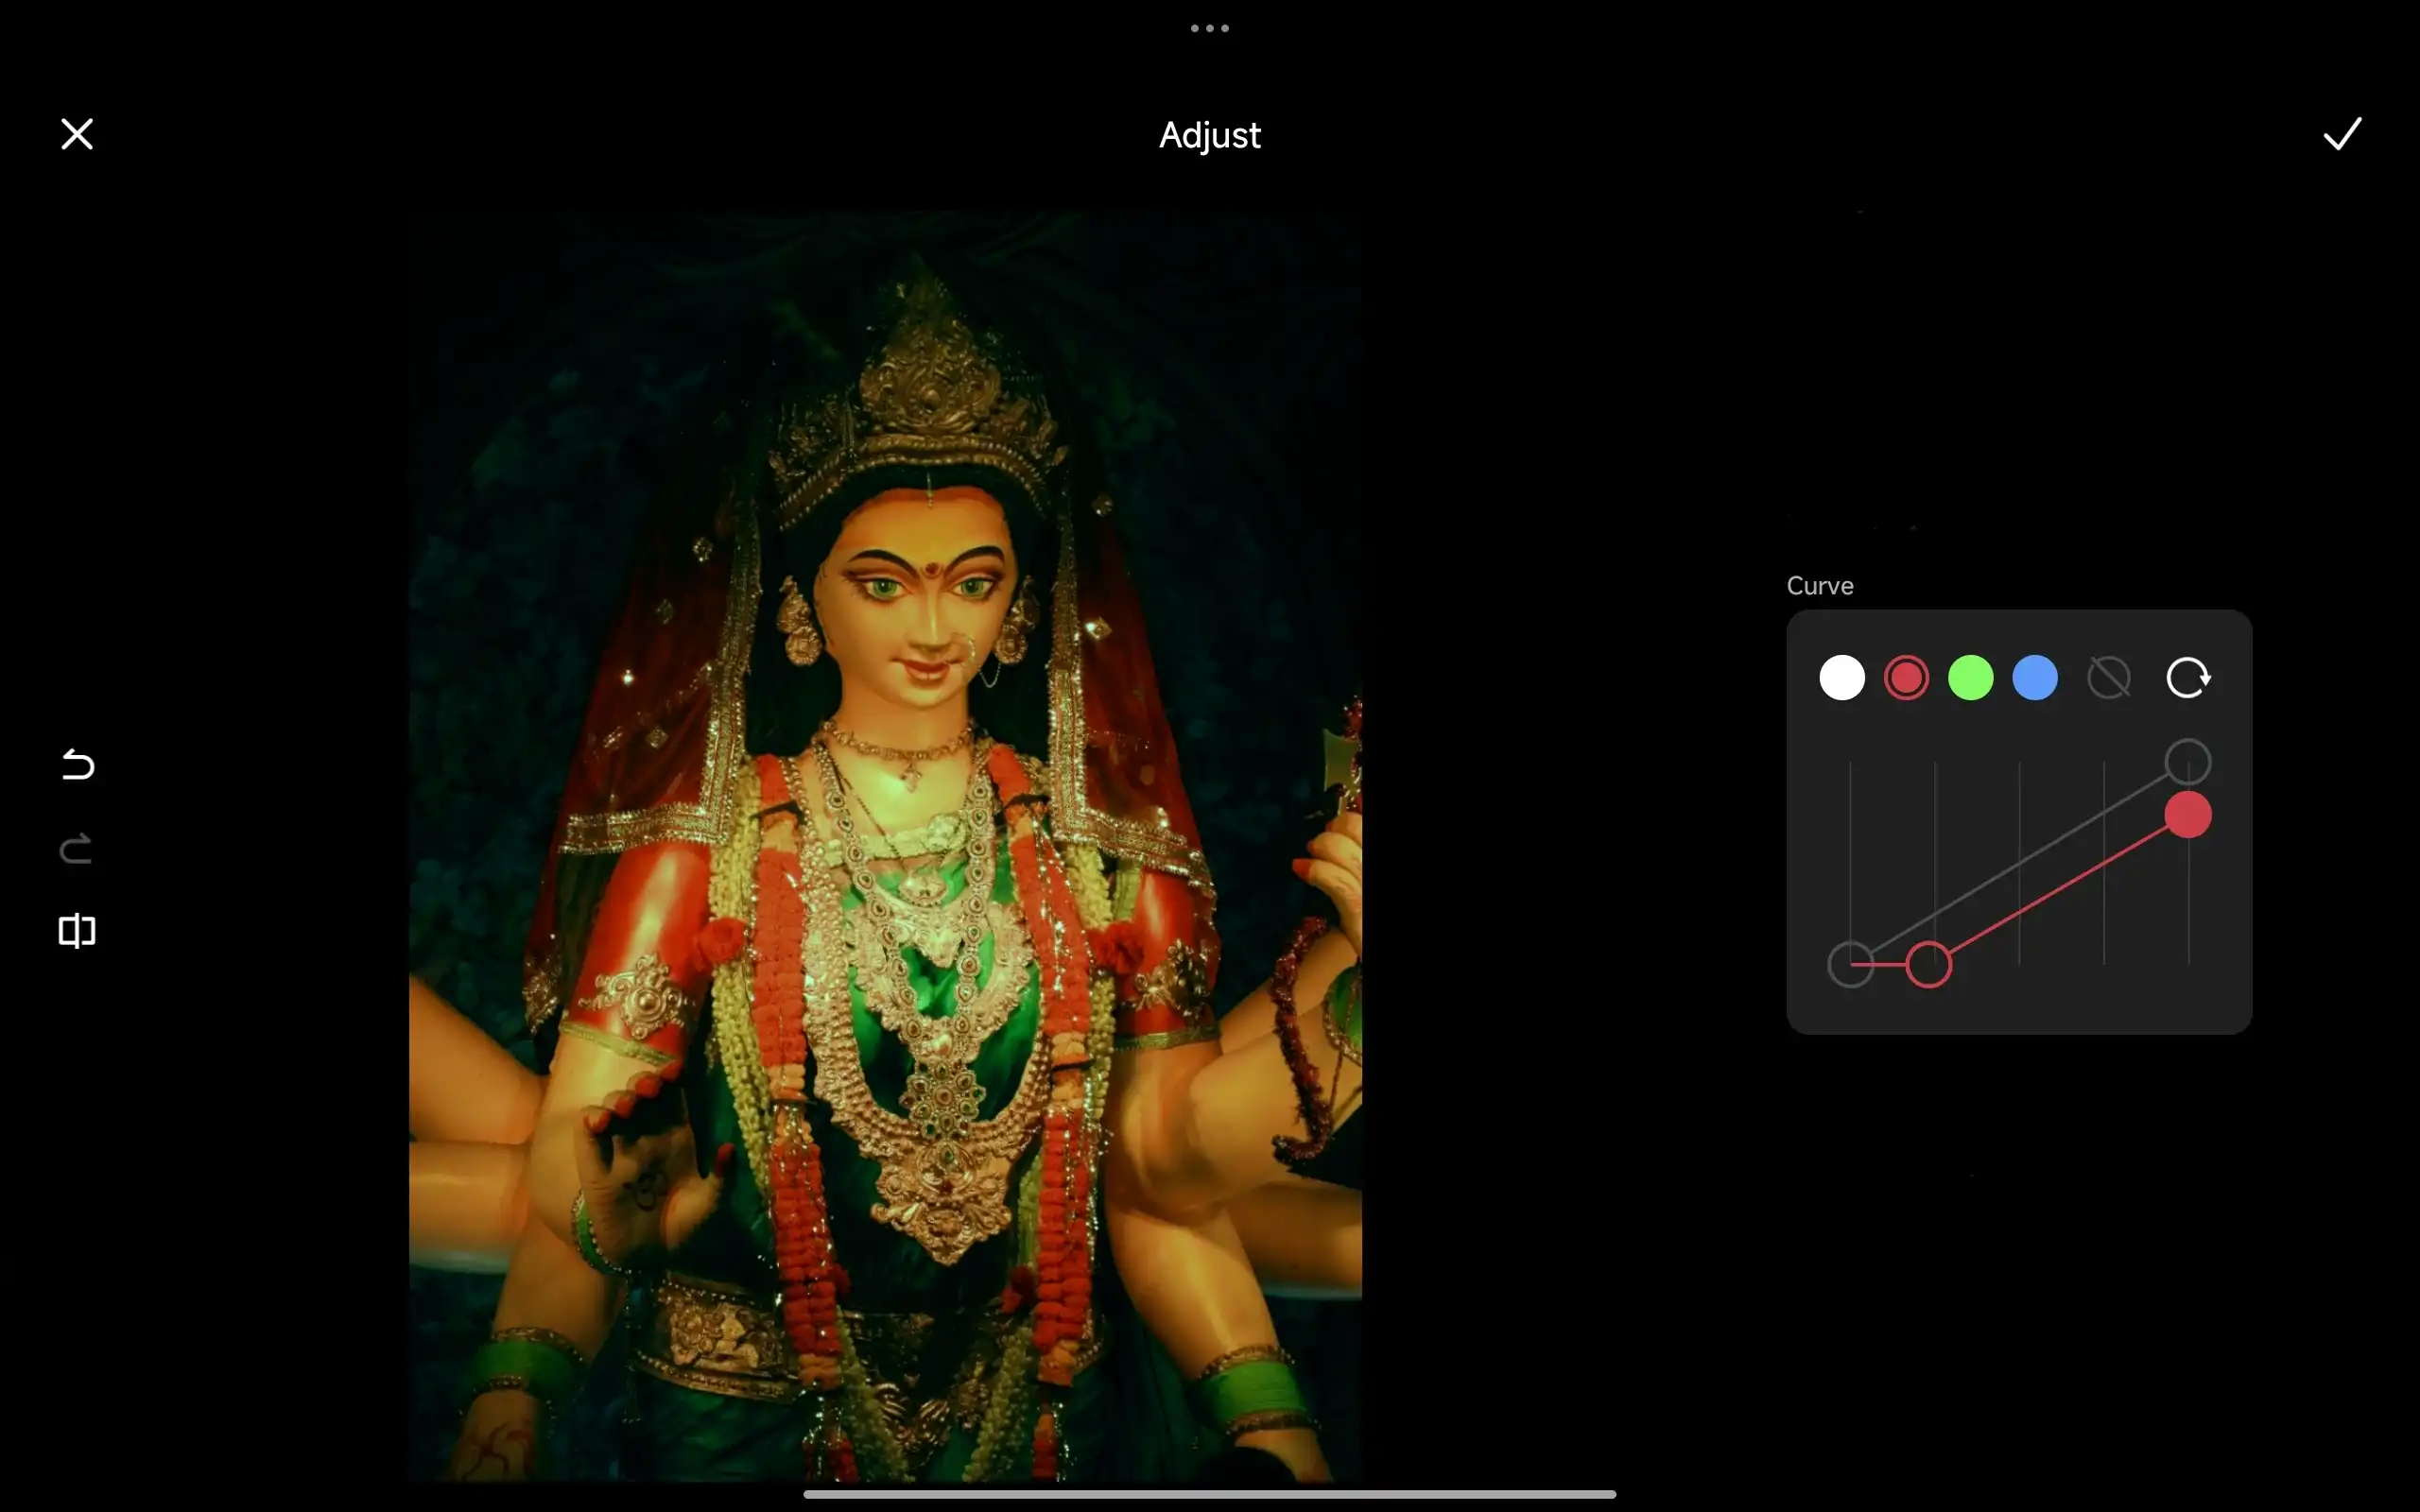
Did you know that you can also manipulate colors using curve adjustments? Yes, you can even correct color casts with this versatile tool! By switching the RGB setting to a specific color channel (Red, Green, or Blue), you can selectively target and adjust those colors within your image. For example, by selecting the Red channel, you can modify the red tones in both the shadows and highlights of your photo.
We've explored the power of Curves, a versatile tool that offers precise control over your image's tonal range and color balance. By mastering Curves, you can elevate your photo editing skills and achieve stunning results.
In our next thread, we'll delve into other advanced techniques, including HSL, Posterize, Despersion, and De-noise. These tools can help you refine colors, create artistic effects, and improve image quality. Stay tuned for more in-depth tutorials and tips!
Stay tuned for more in-depth tutorials and tips!
DSR
Photography Team
IG: @dsr1505
The Power of Photo Editing: Beyond Just Filters
Mastering the Fundamentals: Exposure, Brightness, Contrast, and Saturation
Mastering Color Manipulation: Vibrance, Warmth, Tint, and Highlights
Mastering Tonal Adjustments: Shadows, Light Range, Dark Range, and Clarity
Adding Creative Flair: Fade, Grain, Sharpness, and Vignette
Mastering Color with HSL: A Deep Dive
Creative Effects and Noise Reduction: Posterize and De-noise